MySQL is a widely used open-source relational database management system (RDBMS) and is the backbone of many web applications. This tutorial will guide you through the process of how to install MySQL on Rocky Linux, a powerful and stable operating system based on the RHEL family. So let’s dive in!
Prerequisites
Before starting the installation process, ensure that you have a Rocky Linux system up and running, and you are logged in as a user with sudo privileges.
How to Install MySQL on Rocky Linux
Update Your System
First and foremost, update your system to ensure you have the latest packages and security updates. Run the following command:
sudo dnf update -yEnable MySQL Repository
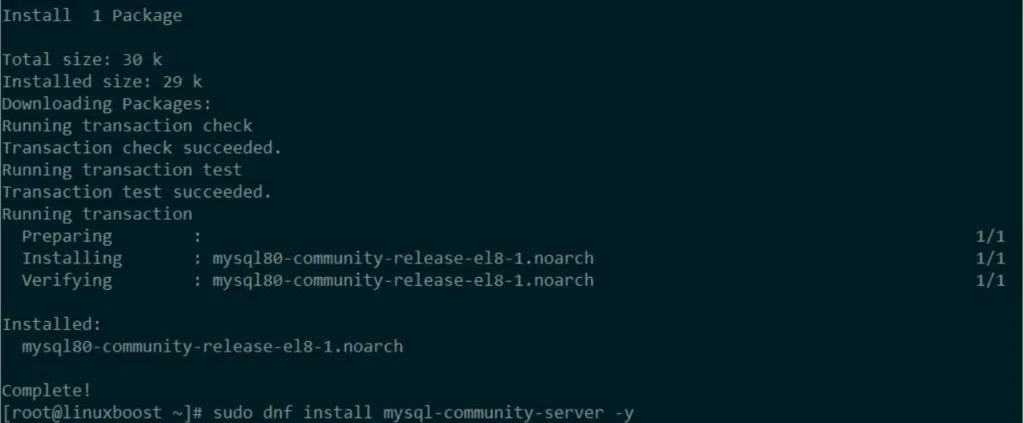
To install MySQL on Rocky Linux, you need to enable the MySQL repository. Execute the following command to add the MySQL repository:
sudo dnf install https://repo.mysql.com/mysql80-community-release-el8-1.noarch.rpm -y
Install MySQL on Rocky Linux
With the repository enabled, you can now install MySQL using the following command:
sudo dnf install mysql-community-server -yStart and Enable MySQL Service
Once the installation is complete, start the MySQL service and enable it to run automatically at system startup:
sudo systemctl start mysqld
sudo systemctl enable mysqld
Secure MySQL Installation
To enhance the security of your MySQL installation, run the mysql_secure_installation script:
sudo mysql_secure_installationThis script will guide you through several security configurations, such as setting a root password, removing anonymous users, disallowing remote root login, and removing the test database.
Connect to MySQL
You can now connect to your MySQL server using the following command:
mysql -u root -pEnter the root password you created during the mysql_secure_installation process, and you’ll be connected to the MySQL shell.
Useful MySQL Commands
Here are some common MySQL commands you might find helpful:
- To view a list of databases, type
SHOW DATABASES; - To create a new database, type
CREATE DATABASE database_name; - To select a database, type
USE database_name; - To view a list of tables in the current database, type
SHOW TABLES;
Further Reading
Congratulations! You have successfully installed MySQL on your Rocky Linux system. If you want to explore more, you can check out some of our other tutorials:
- How to Install phpMyAdmin on Rocky Linux
- How to Install PHP on Rocky Linux
- How to Install LAMP Stack on Rocky Linux
- How to Install MariaDB on Rocky Linux
- How to Install PostgreSQL on Rocky Linux
For more advanced database management topics, you might want to consider learning about How to Set Up a Cron Job on Rocky Linux and How to Manage LVM Volumes on Rocky Linux. These tutorials will provide you with valuable information on automating tasks and managing logical volumes on your Rocky Linux system.
Conclusion
In this tutorial, we walked you through the process of installing MySQL on Rocky Linux, securing the installation, and connecting to the MySQL server. With MySQL now up and running, you can start building and managing your databases.
Remember, this is just the beginning of your journey with MySQL and Rocky Linux. There are many other aspects of database management and server administration you can explore to optimize your MySQL installation and improve your overall experience with Rocky Linux.
If you have any questions or need further assistance, don’t hesitate to leave a comment below or visit the official MySQL Documentation for more in-depth information.


