
Bacula is an open-source, enterprise-level backup solution that provides a robust and flexible backup system for Linux, Unix, and Windows environments. In this guide, we will walk you through the process of how to install and Bacula Backup Server on Rocky Linux.
Prerequisites
Before proceeding, make sure you have:
- A system running Rocky Linux
- A user with sudo privileges
- A stable internet connection
How to Install Bacula Backup Server on Rocky Linux
Update Your System
First, update your system to ensure you have the latest packages installed:
sudo dnf update -yInstall Required Dependencies on Rocky Linux
Next, install the required dependencies:
sudo dnf install -y epel-release
sudo dnf install -y mariadb mariadb-server
To learn more about installing MariaDB on Rocky Linux, check out our guide on how to install MariaDB on Rocky Linux.
Configure MariaDB on Rocky Linux
Start and enable the MariaDB service:
sudo systemctl start mariadb
sudo systemctl enable mariadb
Secure the MariaDB installation:
sudo mysql_secure_installationDuring this process, you’ll be prompted to set a root password and configure various security settings.
Create a Bacula Database and User
Log in to the MariaDB server:
sudo mysql -u root -pCreate a Bacula database and user:
CREATE DATABASE bacula;
GRANT ALL PRIVILEGES ON bacula.* TO 'bacula'@'localhost' IDENTIFIED BY 'your_bacula_password';
FLUSH PRIVILEGES;
EXIT;
Remember to replace 'your_bacula_password' with a strong password.
Install Bacula Backup Server on Rocky Linux
To install Bacula packages, run the following commands:
sudo dnf install -y bacula-director bacula-storage bacula-console bacula-client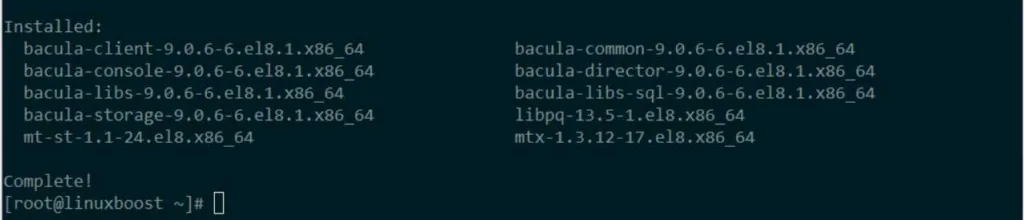
Configure Bacula Backup on Rocky Linux
Edit the Bacula Director configuration file:
sudo nano /etc/bacula/bacula-dir.confUpdate the database connection details in the dbpassword field with the password you set earlier:
dbdriver = "dbi:mysql"; dbaddress = "localhost"; dbport = 3306; dbname = "bacula"; dbuser = "bacula"; dbpassword = "your_bacula_password"Edit the Bacula Storage configuration file:
sudo nano /etc/bacula/bacula-sd.confUpdate the password for the Storage section:
Director {
  Name = bacula-dir
  Password = "your_bacula_password"
}
Edit the Bacula Console configuration file:
sudo nano /etc/bacula/bconsole.confUpdate the password for the Director section:
Director {
  Name = bacula-dir
  Password = "your_bacula_password"
}
Edit the Bacula File Daemon configuration file:
sudo nano /etc/bacula/bacula-fd.confUpdate the password for the Director section:
Director {
  Name = bacula-dir
  Password = "your_bacula_password"
}
Start and Enable Bacula Services on Rocky Linux
Start and enable the Bacula Director, Storage, and File Daemon services:
- Bacula Director service: To start and enable the Bacula Director service, run the following commands:
sudo systemctl start bacula-dir
sudo systemctl enable bacula-dir- Bacula Storage service: To start and enable the Bacula Storage service, run the following commands:
sudo systemctl start bacula-sd
sudo systemctl enable bacula-sd- Bacula File Daemon service: To start and enable the Bacula File Daemon service, run the following commands:
sudo systemctl start bacula-fd
sudo systemctl enable bacula-fd
Configure the Bacula Console on Rocky Linux
Bacula Console is a command-line interface for managing and monitoring your Bacula backup server. Follow these steps to configure the Bacula Console:
- Install the Bacula Console package:
sudo dnf install bacula-console -y- Create a configuration file for the Bacula Console:
sudo nano /etc/bacula/bconsole.conf- Add the following configuration to the newly created file:
Director {
  Name = bacula-dir
  DIRport = 9101
  address = 127.0.0.1
  Password = "{DIR_PASSWORD}"
}
Replace {DIR_PASSWORD} with the password you set for the Bacula Director in the /etc/bacula/bacula-dir.conf file.
- Save the changes and exit the text editor.
Test Bacula Console Connection on Linux
To ensure that your Bacula Console is connected to the Bacula Director, run the following command:
sudo bconsoleYou should see the * prompt if the connection is successful.
Step 10: Backup and Restore Clients
With the Bacula backup server installed and configured on Rocky Linux, you can now install and configure the Bacula client on any clients you want to back up. After setting up Bacula clients, you can create backup jobs and perform restores using the Bacula Console.
Conclusion
In this guide, you learned how to install and configure the Bacula backup server on Rocky Linux. You also learned how to start and enable Bacula services, configure the Bacula Console, and test the connection to the Bacula Director. With this knowledge, you can now create reliable backups and restore your data.
For additional information and resources, check out these articles:
- How to Create RAID 1 in Ubuntu
- How to Install and Configure Rsync on Rocky Linux
- How to Install and Configure Prometheus on Rocky Linux
- How to Install and Configure Zabbix on Rocky Linux
- How to Install MongoDB on Rocky Linux
We hope this guide was helpful and that you now have a working Bacula backup server on Rocky Linux.


