
In this tutorial, we will explore how to install and configure rsync on Rocky Linux. Rsync is a powerful tool for efficiently transferring and synchronizing files across systems by checking the differences between the source and destination files. It is particularly useful for backing up data and keeping files in sync between remote servers.
Table of Contents
- Prerequisites
- Installing Rsync
- Configuring Rsync
- Setting up Rsync over SSH
- Rsync Daemon Configuration
- Testing Rsync
- Conclusion
How to Install and Configure Rsync on Rocky Linux
Prerequisites
- A fresh installation of Rocky Linux
- Access to the command line/terminal window
- Familiarity with basic Linux commands
Installing Rsync on Rocky Linux
Rsync is available in the default Rocky Linux repositories. To install it, run the following command:
sudo dnf install rsyncConfirm the installation by checking the rsync version:
rsync --version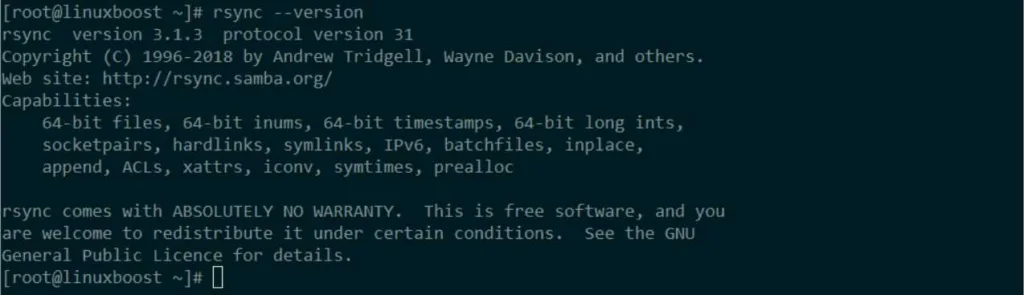
You should see the installed version of rsync displayed on your terminal.
Configuring Rsync on Rocky Linux
To configure rsync, you will need to create a configuration file. We recommend creating a configuration file in your home directory to avoid any permission issues.
touch ~/.rsyncd.confNow, open the configuration file with your preferred text editor, such as nano or vim:
nano ~/.rsyncd.confPaste the following configuration into the file:
[backup]
path = /path/to/backup/directory
comment = Backup directory
uid = your-username
gid = your-groupname
read only = no
list = yes
Replace /path/to/backup/directory with the desired backup directory path, and set the uid and gid to your user and group names, respectively.
Save the changes and exit the text editor.
Setting up Rsync over SSH on Rocky Linux
To use rsync securely over the internet, you should set up an SSH connection. If you haven’t installed OpenSSH yet, follow the guide on how to install OpenSSH on Arch Linux.
Once you have OpenSSH installed, you can use the following command to copy files from a local directory to a remote server securely:
rsync -avz -e 'ssh -p SSH_PORT' /path/to/local/directory/ remote-user@remote-host:/path/to/remote/directory/Replace SSH_PORT with your SSH port number, /path/to/local/directory/ with the local directory path you want to sync, remote-user with the remote server’s username, remote-host with the remote server’s IP address or hostname, and /path/to/remote/directory/ with the remote directory path.
Rsync Daemon Configuration on Rocky Linux
If you want to set up rsync as a daemon, you’ll need to configure the rsyncd.conf file. This file is responsible for controlling the behavior and functionality of the rsync daemon.
Create the rsyncd.conf File on Rocky Linux
First, create a new file called rsyncd.conf in the /etc directory:
sudo touch /etc/rsyncd.confEdit the rsyncd.conf File
Open the newly created rsyncd.conf file with your favorite text editor. For instance, you can use nano:
sudo nano /etc/rsyncd.confNow, add the following configuration settings to the file. Make sure to replace {module_name} with a name of your choice, and {path} with the path to the directory you want to synchronize:
uid = nobody
gid = nobody
use chroot = yes
max connections = 4
pid file = /var/run/rsyncd.pid
lock file = /var/run/rsync.lock
log file = /var/log/rsync.log

[{module_name}]
    path = {path}
    comment = Rsync module
    read only = no
    list = yes
    timeout = 300
    auth users = rsync_user
    secrets file = /etc/rsyncd.secrets
Save the file and exit the text editor.
Create the rsyncd.secrets File
Next, create an rsyncd.secrets file that will store the authentication credentials for the rsync daemon:
sudo touch /etc/rsyncd.secretsEdit the rsyncd.secrets file and add the following line, replacing {rsync_user} and {rsync_password} with the desired username and password:
{rsync_user}:{rsync_password}Save the file and exit the text editor.
Set Proper Permissions for the rsyncd.secrets File
For security reasons, set the proper permissions for the rsyncd.secrets file:
sudo chmod 600 /etc/rsyncd.secretsStart the Rsync Daemon on Rocky Linux
Now that the configuration files are in place, start the rsync daemon:
sudo systemctl start rsyncdEnable the Rsync Daemon to Start on Boot
To ensure the rsync daemon starts automatically upon system boot, enable the service:
sudo systemctl enable rsyncdConclusion
You’ve successfully installed and configured rsync on your Rocky Linux system. Now you can leverage the power of this versatile tool to synchronize files and directories between local and remote systems efficiently.
For further information on how to use rsync, consult the official documentation. If you’re interested in exploring other useful Linux tools and applications, check out our guides on how to install and configure Bacula on Arch Linux or how to install and configure Lighttpd on Rocky Linux.


