When it comes to editing text files on a Linux-based system, it’s essential to have a reliable text editor at your disposal. Nano is one such lightweight and user-friendly text editor that’s popular among Linux users, especially those new to the platform. In this blog post, we’ll walk you through the process of how to install Nano on CentOS 8.
Why Choose Nano?
Nano is an excellent choice for users who prefer a simple and easy-to-use text editor. It offers a clean interface with no complicated options, making it perfect for beginners. However, if you’re looking for a more feature-rich text editor, you might want to consider alternatives like Vim or Emacs.
Prerequisites
Before we begin, ensure you have the following:
- A CentOS 8 system: You should have CentOS 8 installed and running on your machine.
- Root privileges: Make sure you have root access or the ability to execute commands with sudo.
How to Install Nano on CentOS 8
Update Your System
Before installing any new software, it’s essential to update your system to ensure you have the latest packages and security patches. To do this, run the following command:
sudo dnf update -yInstall Nano Text Editor on CentOS 8
With your system updated, you can now install Nano using the CentOS package manager, DNF. Run the following command:
sudo dnf install nano -y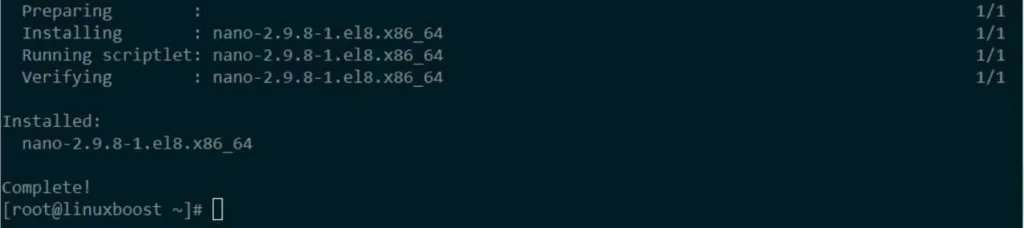
This command will install the latest version of Nano available in the CentOS repositories.
Verify the Installation
Once the installation is complete, you can check the installed version of Nano by running:
nano --versionThis command will display the version number and other details about the installed Nano text editor.
Using Nano Text Editor
Now that you have successfully installed Nano, you can start using it to edit your text files. To open a file with Nano, simply run:
nano /path/to/your/fileReplace /path/to/your/file with the actual path to the file you want to edit. If the file doesn’t exist, Nano will create a new one with the specified name.
Here are some basic keyboard shortcuts to help you navigate the Nano text editor:
- Ctrl + X: Exit Nano
- Ctrl + O: Save changes
- Ctrl + W: Search for text
- Ctrl + K: Cut the current line
- Ctrl + U: Paste the previously cut text
- Ctrl + C: Display the current cursor position
Additional Considerations
- If you’re looking to explore other text editors, you might want to consider installing Vim
- You can also customize your Nano text editor to better suit your preferences and workflow.
Conclusion
Congratulations! You have successfully installed Nano on your CentOS 8 system. This lightweight and user-friendly text editor is a great choice for those who prefer simplicity over advanced features. Now that you have Nano installed, you can start editing your text files with ease. If you’re interested in exploring other Linux-related topics, feel free to check out our other guides on LinuxBoost
Here are some additional resources you might find helpful:
- How to Install and Configure LAMP Stack
- How to Install Git
- How to Set Up an OpenVPN Server
- How to Install Ruby
- How to Install wget
With these resources, you can continue to expand your knowledge and skills in managing your CentOS 8 system. Whether you’re setting up a LAMP stack for web development or configuring an OpenVPN server for secure remote access, our comprehensive guides will provide you with the information you need.
Remember, learning how to manage and maintain a Linux system is an ongoing process. The more you explore, the more proficient you’ll become. The Linux community is always eager to help, so don’t hesitate to ask for assistance or advice when needed. Good luck,


