Zabbix is a powerful open-source monitoring solution that provides real-time monitoring of servers, network devices, and applications. In this comprehensive guide, we will walk you through the process of how to install and configure Zabbix on Rocky Linux, an enterprise-grade Linux distribution.
How to Install and Configure Zabbix on Rocky Linux
Prerequisites
Before we begin, ensure that you have the following:
- A Rocky Linux server with root access
- LAMP stack installed (Apache, MySQL/MariaDB, PHP)
- A valid domain name configured to point to your server
Install and Configure MySQL/MariaDB on Rocky Linux
First, we need to install a database server to store Zabbix data. You can choose between MySQL or MariaDB. For this tutorial, we will use MariaDB. If you haven’t installed it yet, follow our guide on how to install MariaDB on Rocky Linux.
Once installed, create a new database and user for Zabbix:
mysql -u root -p
CREATE DATABASE zabbix_db;
GRANT ALL PRIVILEGES ON zabbix_db.* TO 'zabbix_user'@'localhost' IDENTIFIED BY 'your_password';
FLUSH PRIVILEGES;
EXIT;
Replace your_password with a strong password.
Install Zabbix Server on Rocky Linux
To install Zabbix, we need to add the Zabbix repository and install the required packages:
rpm -Uvh https://repo.zabbix.com/zabbix/5.0/rhel/8/x86_64/zabbix-release-5.0-1.el8.noarch.rpm
dnf clean all
dnf -y install zabbix-server-mysql zabbix-web-mysql zabbix-agent zabbix-apache-conf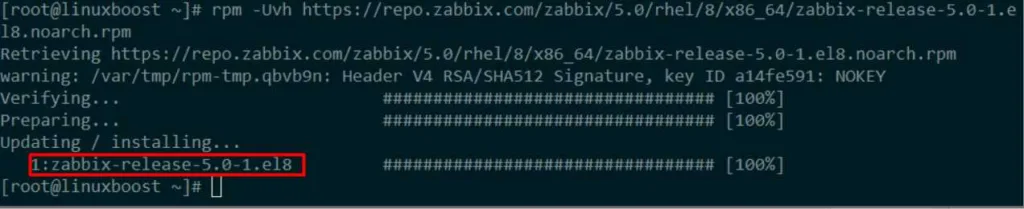
Import Zabbix Database Schema on Rocky Linux
Next, import the Zabbix database schema using the following commands:
zcat /usr/share/doc/zabbix-server-mysql*/create.sql.gz | mysql -u zabbix_user -p zabbix_dbEnter the password for the zabbix_user when prompted.
Configure Zabbix Server on Rocky Linux
Edit the Zabbix server configuration file /etc/zabbix/zabbix_server.conf:
nano /etc/zabbix/zabbix_server.confUpdate the following lines with your database details:
DBName=zabbix_db
DBUser=zabbix_user
DBPassword=your_password
Save and exit the file.
Configure PHP for Zabbix Web Interface
Edit the Zabbix Apache configuration file /etc/httpd/conf.d/zabbix.conf:
nano /etc/httpd/conf.d/zabbix.confFind the following lines and update the timezone:
php_value[date.timezone] = your_timezoneReplace your_timezone with your preferred timezone, e.g., America/New_York. You can find a list of supported timezones here.
Save and exit the file.
Start and Enable Zabbix Services on Linux
Enable and start Zabbix server, agent, and Apache services:
systemctl enable zabbix-server zabbix-agent httpd
systemctl start zabbix-server zabbix-agent httpd
Configure Firewall on Rocky Linux
Allow incoming connections to the Zabbix web interface and agent:
firewall-cmd --add-service={http,https} --permanent
firewall-cmd --add-port=10050/tcp --permanent
firewall-cmd --reload
Configure Zabbix Frontend
Access the Zabbix frontend by opening your favorite web browser and navigating to:
http://your_server_ip/zabbixYou’ll be greeted with the Zabbix welcome screen. Click Next step to proceed.
- Check prerequisites: The Zabbix installation will check if all prerequisites are met. If there are no issues, click Next step.
- Configure DB connection: Enter the database information you set up earlier:
- Database type: MySQL
- Database host: localhost
- Database port: 3306 (default)
- Database name: zabbix
- User: zabbix
- Password: your_password_here
- Click Next step.
- Zabbix server details: Enter your server details:
- Name: Zabbix Server (or any name you prefer)
- Host: localhost
- Port: 10051 (default)
- Click Next step.
- Pre-installation summary: Review the pre-installation summary and click Next step if everything is correct.
- Install: Click Finish to complete the installation.
Log in to Zabbix
After the installation is complete, you’ll be redirected to the Zabbix login page. The default username and password are:
- Username: Admin
- Password: zabbix
You are now logged into your Zabbix server. Take some time to explore the features and settings available to you.
Conclusion
Congratulations! You have successfully installed and configured Zabbix on Rocky Linux. You can now start monitoring your network devices, servers, and applications using this powerful open-source monitoring solution. For further information on Zabbix, check out their official documentation.
If you want to explore more about Linux server administration, check out our other guides on topics like installing and configuring Nagios on Rocky Linux, setting up a RAID 1 array in Ubuntu, and installing MongoDB on Rocky Linux.


