In this tutorial, we’ll walk through the process of how to install PowerDNS server on Rocky Linux, a popular open-source DNS server. PowerDNS offers excellent performance, flexibility, and security for your domain name system (DNS) requirements.
Before we dive in, you should ensure that you have a fresh installation of Rocky Linux and are familiar with basic system administration tasks. To get started with Rocky Linux, you can follow our guide on how to install Ansible server on Rocky Linux.
Prerequisites
- Fresh Rocky Linux installation
- Familiarity with basic system administration tasks
- Root or sudo access
How to Install PowerDNS Server on Rocky Linux
Update and Install Required Packages
First, update your system by running the following command:
sudo dnf update -yNext, install the EPEL repository and PowerDNS repository:
sudo dnf install -y epel-release
sudo dnf install -y https://repo.powerdns.com/repo-files/pdns-repo.rpm
With the repositories in place, you can now install the PowerDNS server and its required components:
sudo dnf install -y pdns pdns-backend-mysql mariadb mariadb-server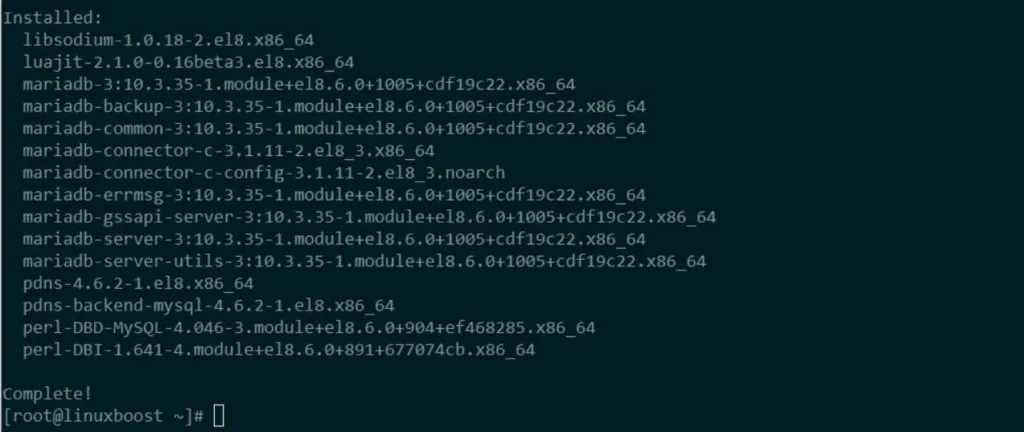
Configure MariaDB and Create PowerDNS Database
After installing MariaDB, you need to configure and secure it. Start and enable the MariaDB service:
sudo systemctl start mariadb
sudo systemctl enable mariadb
Next, run the mysql_secure_installation script to secure your MariaDB installation:
sudo mysql_secure_installationNow, log in to the MariaDB shell as the root user and create a new database for PowerDNS:
CREATE DATABASE powerdns;
GRANT ALL PRIVILEGES ON powerdns.* TO 'pdns'@'localhost' IDENTIFIED BY 'your-password';
FLUSH PRIVILEGES;
Replace ‘your-password’ with a strong password of your choice. Afterward, create the necessary tables for PowerDNS:
USE powerdns;

CREATE TABLE domains (
  id INT AUTO_INCREMENT,
  name VARCHAR(255) NOT NULL,
  master VARCHAR(128) DEFAULT NULL,
  last_check INT DEFAULT NULL,
  type VARCHAR(6) NOT NULL,
  notified_serial INT DEFAULT NULL,
  account VARCHAR(40) DEFAULT NULL,
  PRIMARY KEY (id)
) Engine=InnoDB;

CREATE TABLE records (
  id INT AUTO_INCREMENT,
  domain_id INT DEFAULT NULL,
  name VARCHAR(255) DEFAULT NULL,
  type VARCHAR(10) DEFAULT NULL,
  content VARCHAR(64000) DEFAULT NULL,
  ttl INT DEFAULT NULL,
  prio INT DEFAULT NULL,
  change_date INT DEFAULT NULL,
  disabled TINYINT(1) DEFAULT 0,
  ordername VARCHAR(255),
  auth TINYINT(1) DEFAULT 1,
  PRIMARY KEY (id)
) Engine=InnoDB;

CREATE INDEX nametype_index ON records(name, type);
CREATE INDEX domain_id ON records(domain_id);
CREATE INDEX recordorder ON records (domain_id, ordername);

ALTER TABLE records ADD CONSTRAINT records_ibfk_1 FOREIGN KEY (domain_id) REFERENCES domains(id) ON DELETE CASCADE;
Finally, exit the MariaDB shell:
EXIT;How to configure PowerDNS on Rocky Linux
With the PowerDNS database in place, you need to configure the PowerDNS server. Open the /etc/pdns/pdns.conf file using your preferred text editor:
sudo vi /etc/pdns/pdns.confEdit the configuration file to include the following settings:
launch=gmysql
gmysql-host=localhost
gmysql-dbname=powerdns
gmysql-user=pdns
gmysql-password=your-password
Remember to replace ‘your-password’ with the password you created earlier for the PowerDNS database user.
Save and exit the configuration file. Then, start and enable the PowerDNS service:
sudo systemctl start pdns
sudo systemctl enable pdns
Configure Firewall
To make your PowerDNS server accessible from external networks, you need to open the necessary ports in the firewall. Execute the following commands to open ports 53 (TCP and UDP) and 8081 (TCP):
sudo firewall-cmd --permanent --add-port=53/tcp
sudo firewall-cmd --permanent --add-port=53/udp
sudo firewall-cmd --permanent --add-port=8081/tcp
sudo firewall-cmd --reload
Test PowerDNS Server
Now that your PowerDNS server is up and running, it’s time to test it. First, add a test domain and record to the PowerDNS database:
sudo mysql -u pdns -p powerdnsEnter your PowerDNS database password and execute the following SQL commands:
INSERT INTO domains (name, type) VALUES ('example.com', 'NATIVE');
INSERT INTO records (domain_id, name, type, content, ttl, prio) VALUES (1, 'example.com', 'SOA', 'ns1.example.com hostmaster.example.com 2023010101 10800 3600 604800 3600', 86400, NULL);
INSERT INTO records (domain_id, name, type, content, ttl, prio) VALUES (1, 'example.com', 'NS', 'ns1.example.com', 86400, NULL);
INSERT INTO records (domain_id, name, type, content, ttl, prio) VALUES (1, 'ns1.example.com', 'A', '192.0.2.1', 86400, NULL);
Replace ‘example.com’ with your domain name and ‘192.0.2.1’ with the IP address of your PowerDNS server. Exit the MariaDB shell:
EXIT;Test your PowerDNS server using the dig command:
dig @localhost example.com SOA +shortIf everything is configured correctly, you should see output similar to the following:
ns1.example.com. hostmaster.example.com. 2023010101 10800 3600 604800 3600Congratulations! You have successfully installed and configured PowerDNS on Rocky Linux. You can now manage your DNS records using PowerDNS. For additional configuration options and advanced features, refer to the official PowerDNS documentation.
To further enhance your Rocky Linux system, check out our other tutorials, such as how to set up RAID 1 on Rocky Linux and how to install KVM virtualization on Rocky Linux.


