
Apache is a popular open-source web server that powers millions of websites worldwide. If you’re looking to set up a web server on your openSUSE system, this guide will walk you through the process step by step on how to Install Apache on openSUSE.
How to Install Apache on openSUSE
Prerequisites
Before you begin, ensure you have the following:
- A running openSUSE system
- Root or sudo user access
Update the System
First, update your openSUSE system to ensure you have the latest packages and security patches. Open a terminal window and run:
sudo zypper updateInstall Apache on openSUSE
Now that your system is up to date, install the Apache web server using the following command
sudo zypper install apache2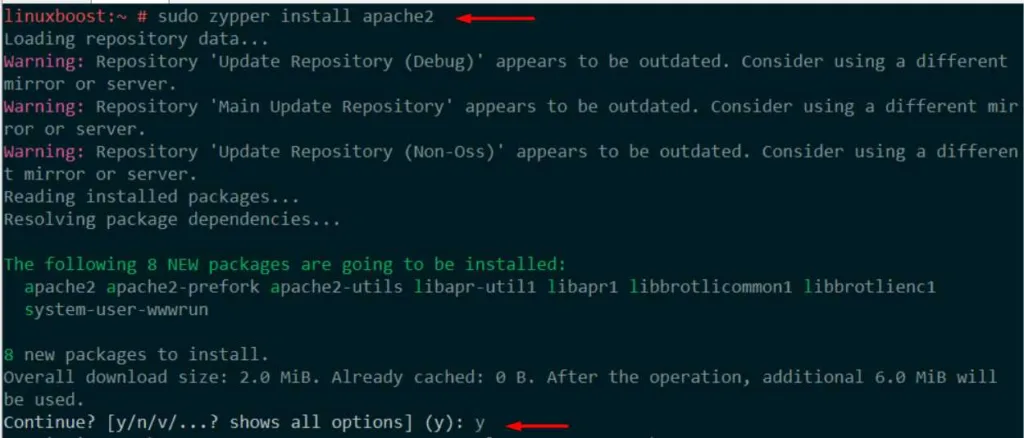
Start and Enable Apache
After the installation is complete, start the Apache service and enable it to start automatically on boot:
sudo systemctl start apache2
sudo systemctl enable apache2
Configure Firewall
To allow external access to your web server, you need to open the necessary ports in the firewall. Run the following commands:
sudo firewall-cmd --permanent --zone=public --add-service=http
sudo firewall-cmd --permanent --zone=public --add-service=https
sudo firewall-cmd --reload
Test Apache
At this point, your Apache web server should be up and running. Open a web browser and navigate to http://your_server_IP_address or http://localhost if you are on the same machine. You should see the default Apache welcome page.
Configure Virtual Hosts (Optional)
If you plan to host multiple websites on your openSUSE system, you may want to set up virtual hosts. To do this, create a new configuration file for each website in the /etc/apache2/vhosts.d/ directory. For example, create a file named example.com.conf with the following content:
<VirtualHost *:80>
    ServerAdmin [email protected]
    ServerName example.com
    ServerAlias www.example.com
    DocumentRoot /var/www/example.com/public_html

    ErrorLog /var/log/apache2/example.com-error.log
    CustomLog /var/log/apache2/example.com-access.log combined
</VirtualHost>
Replace example.com with your domain name and adjust the paths accordingly. Create the necessary directories and set the appropriate permissions:
sudo mkdir -p /var/www/example.com/public_html
sudo chown -R www-data:www-data /var/www/example.com/public_html
sudo chmod -R 755 /var/www/example.com
Finally, restart Apache to apply the changes:
sudo systemctl restart apache2You have now successfully installed and configured Apache on your openSUSE system. For more tutorials on openSUSE and other Linux distributions, check out the following articles:


